
Your first Markdown save in Jira
Start with a small example, review its formatting, then save it to an existing Jira issue.
Before you start
A Jira site administrator must install Markdown Mode for Jira from the Atlassian Marketplace. It is a paid app; review the current price and any trial there.
Use a test issue for your first try. You need permission to edit its description, or to add a comment. If the app is already installed, start below.
Save a description in five steps
Open the issue action
Open an existing Jira Cloud issue. Choose ••• (Actions) → Edit in Markdown.
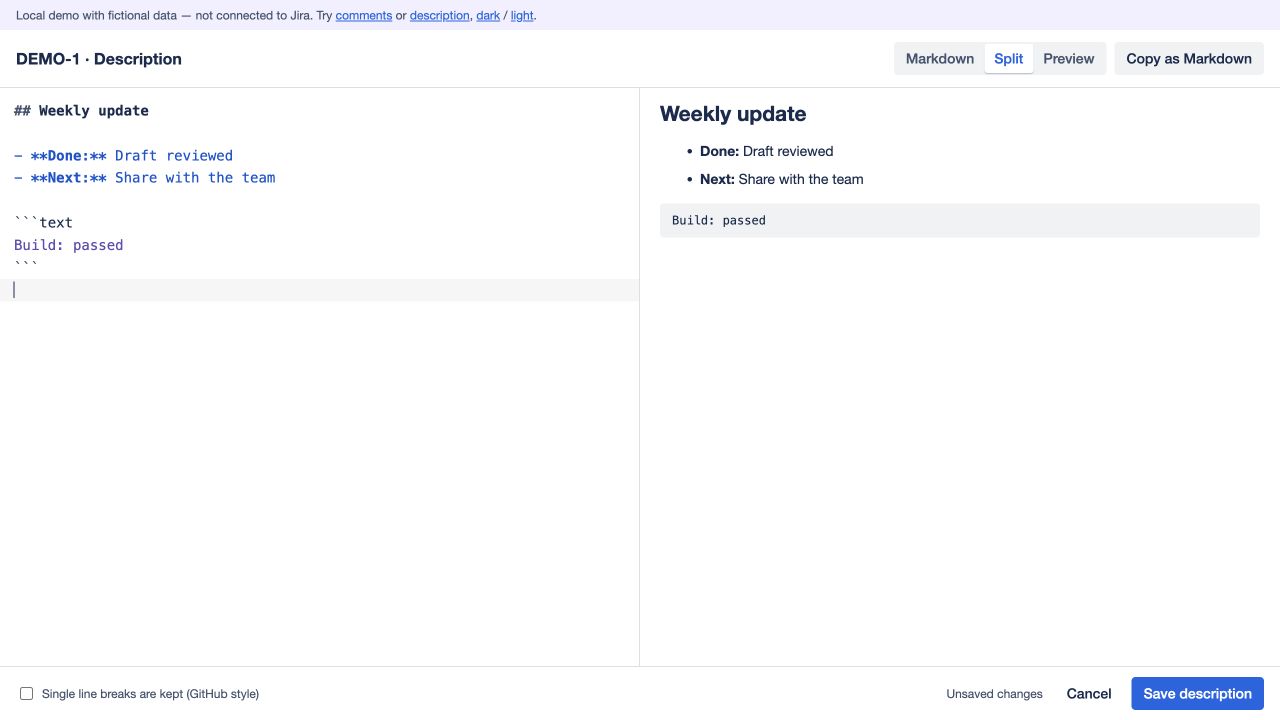
Write or paste a small example
The editor loads the description already on the issue. On an empty test issue, paste the example below. If there is existing content, append the example beneath it instead of replacing it.
Compare the Markdown and preview
Use Split to see both panes, or Preview to focus on the result. Check that the heading, bold labels, list and code block look right. Review AI-generated Markdown before saving it.
Save the description
Choose Save description. You can also use Cmd/Ctrl+Enter inside the editor. The app saves native Jira content.
Check the issue again
Return to the Jira issue and check the description. Reopen it if needed to confirm the formatting is still there.
Example to paste
This sample contains no credentials or customer data.
## Weekly update

- **Done:** Draft reviewed
- **Next:** Share with the team

```text
Build: passed
```
Want a comment instead?
Open ••• (Actions) → Comment in Markdown. Choose + New comment if needed, write or paste the text, review the preview, then choose Add comment. Check that the new comment appears on the issue.
Edit in Markdown changes the description; Comment in Markdown is the separate comment workflow. This app opens from an existing issue’s Actions menu; it does not replace Jira’s built-in editor or Quick Create form.
Small comment example
## Review complete

- Headings and lists look right.
- Code block checked in the preview.
If something blocks you
| What you see | What to do |
|---|---|
| The two actions are missing | Ask your Jira administrator to check that the app is installed and enabled. Open an existing issue in Jira Cloud. |
| The editor is read-only | Ask your administrator to check your permission to edit that issue or add a comment. |
| An active subscription is required | Ask your site administrator to review the app’s subscription in Atlassian. |
| The description changed while you were editing | Keep a copy of your unsaved text, reload the latest description and review it before deciding what to save. |
Need help?
Email support@ppftec.com. Tell us which step stopped you and the exact error. Redact private issue content in any screenshot.
Full documentation and tested-scope limitations · Marketplace listing